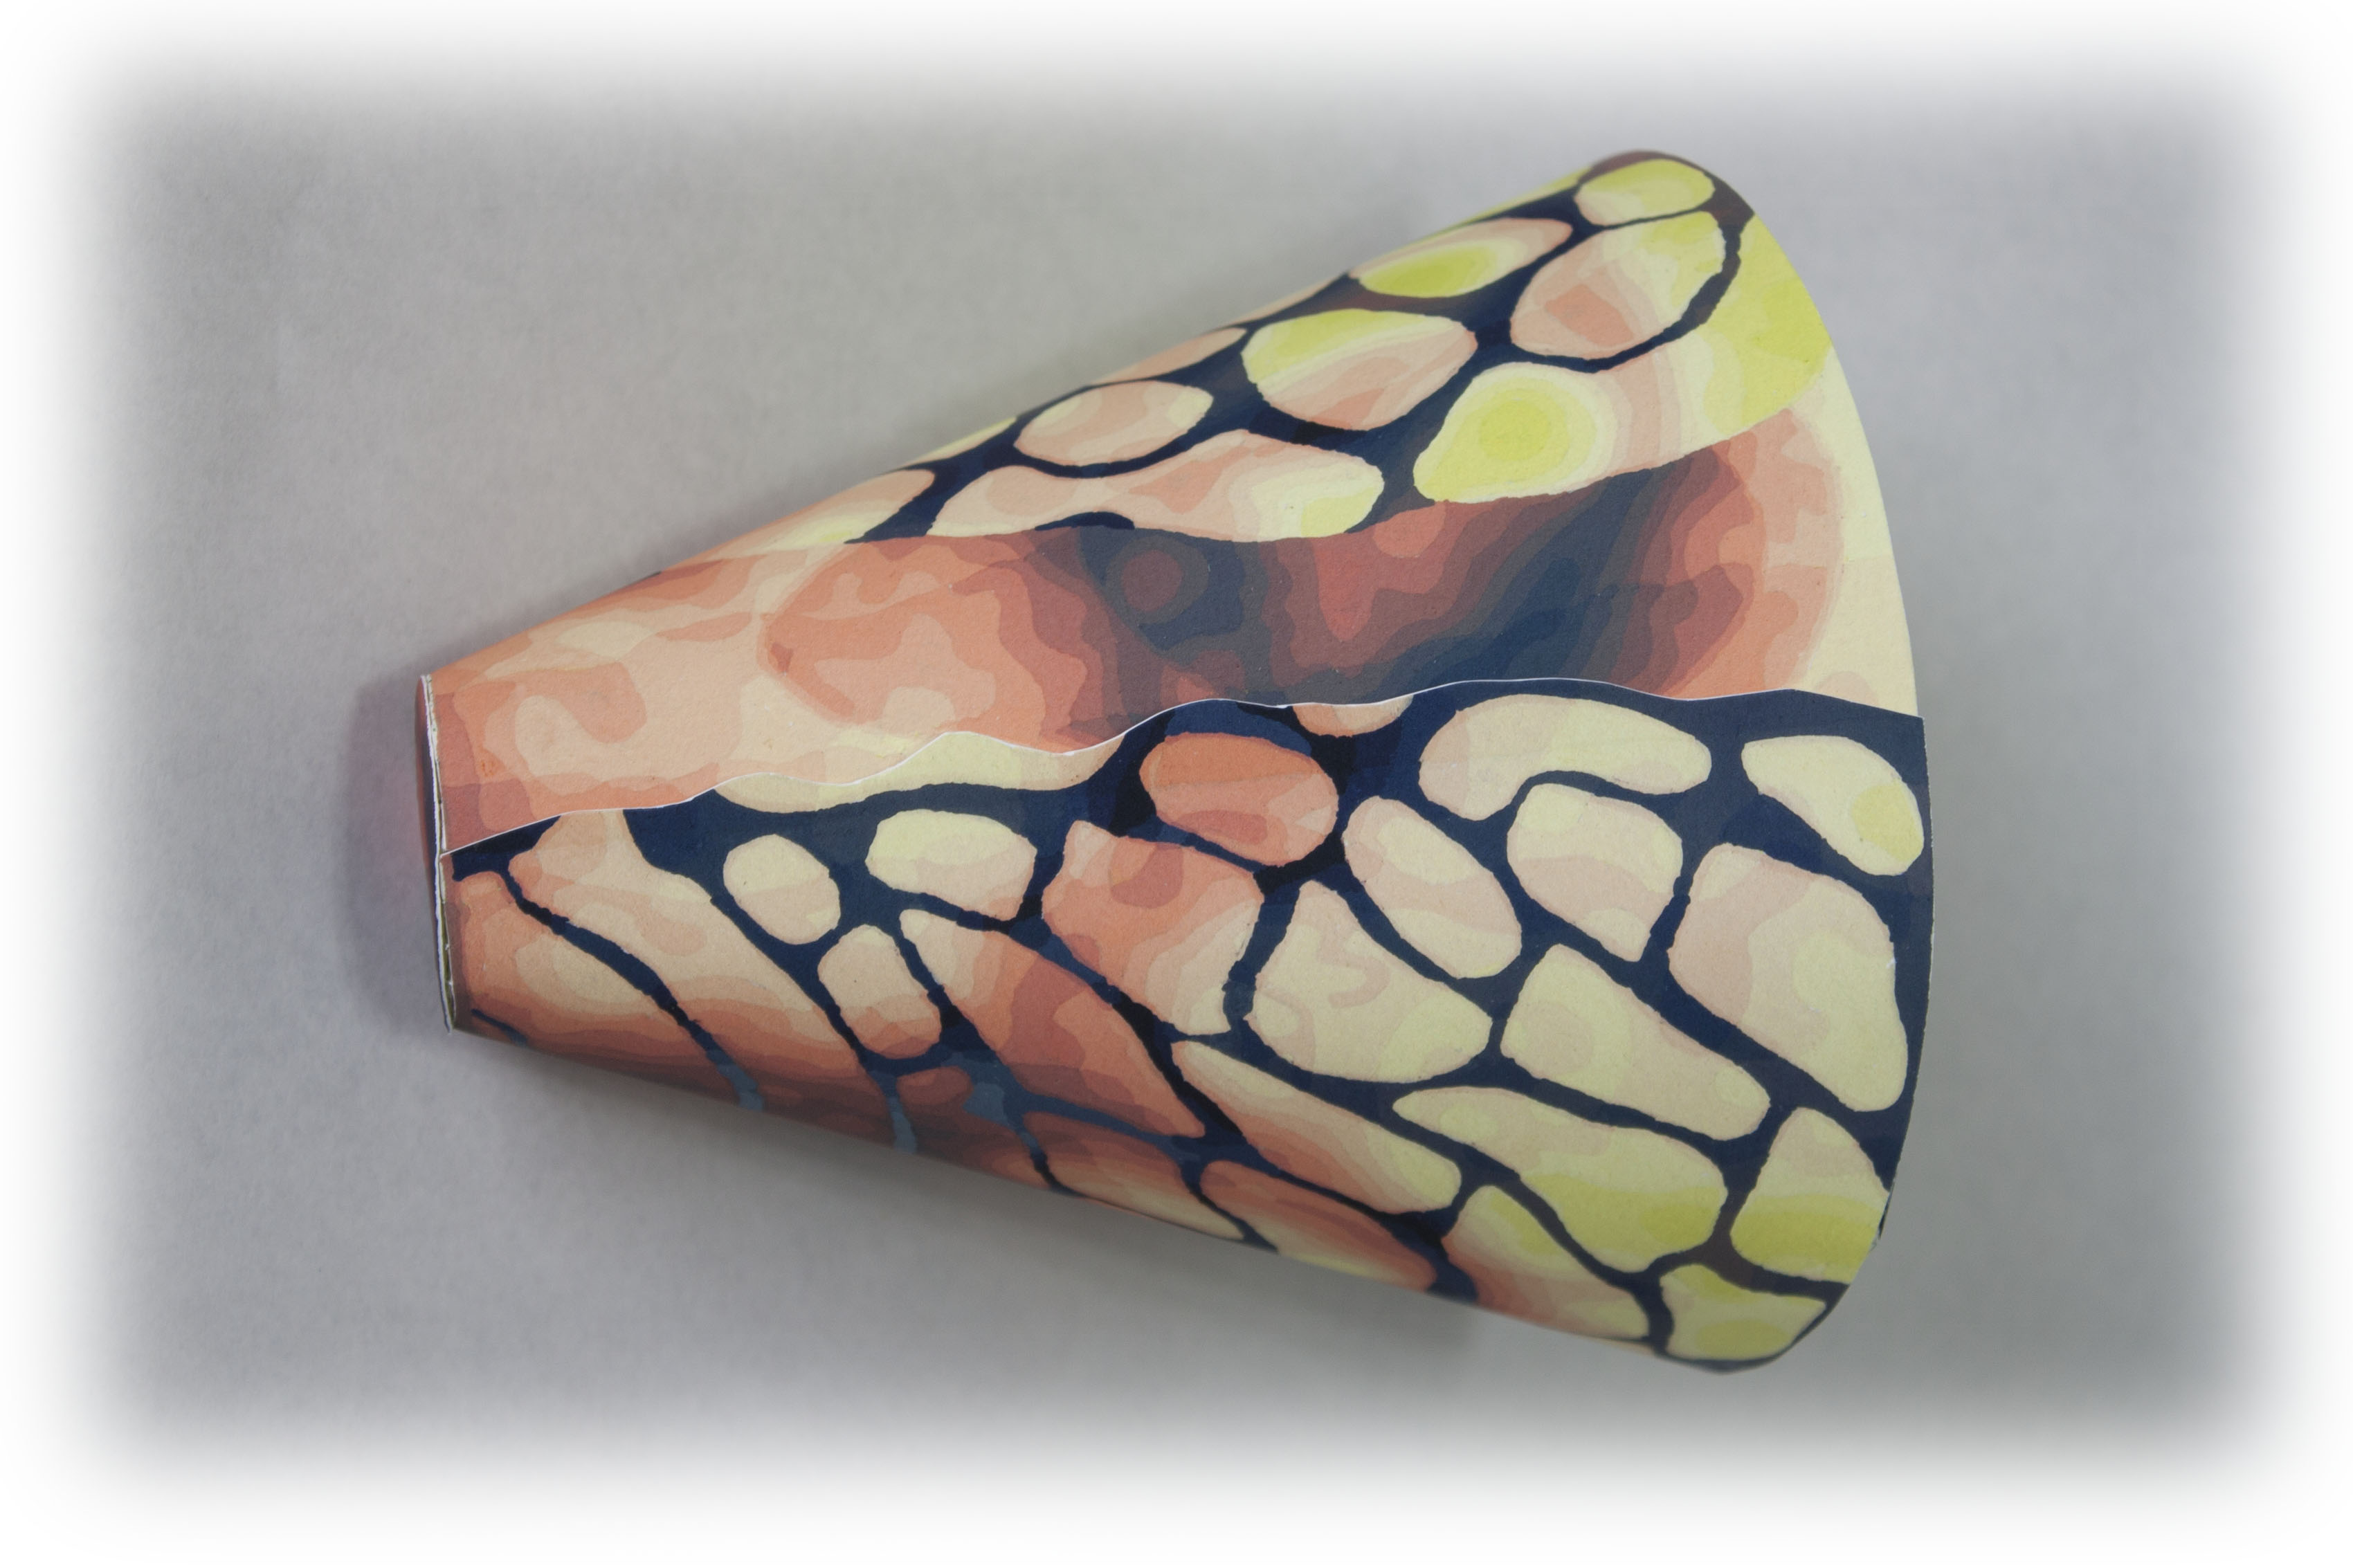
I never cease to be amazed at the beauty of shapes and patterns in nature. To me nature’s designs suggest the work of a Designer.
To view an image at high resolution please click once.
To assemble the above shell one needs the nets. The nets are designed using fairly basic mathematics. The trickiest part was the small ellipse set obliquely at the tapering end of the cone (Part C). The nets below have the designs needed to guide the painting phase.
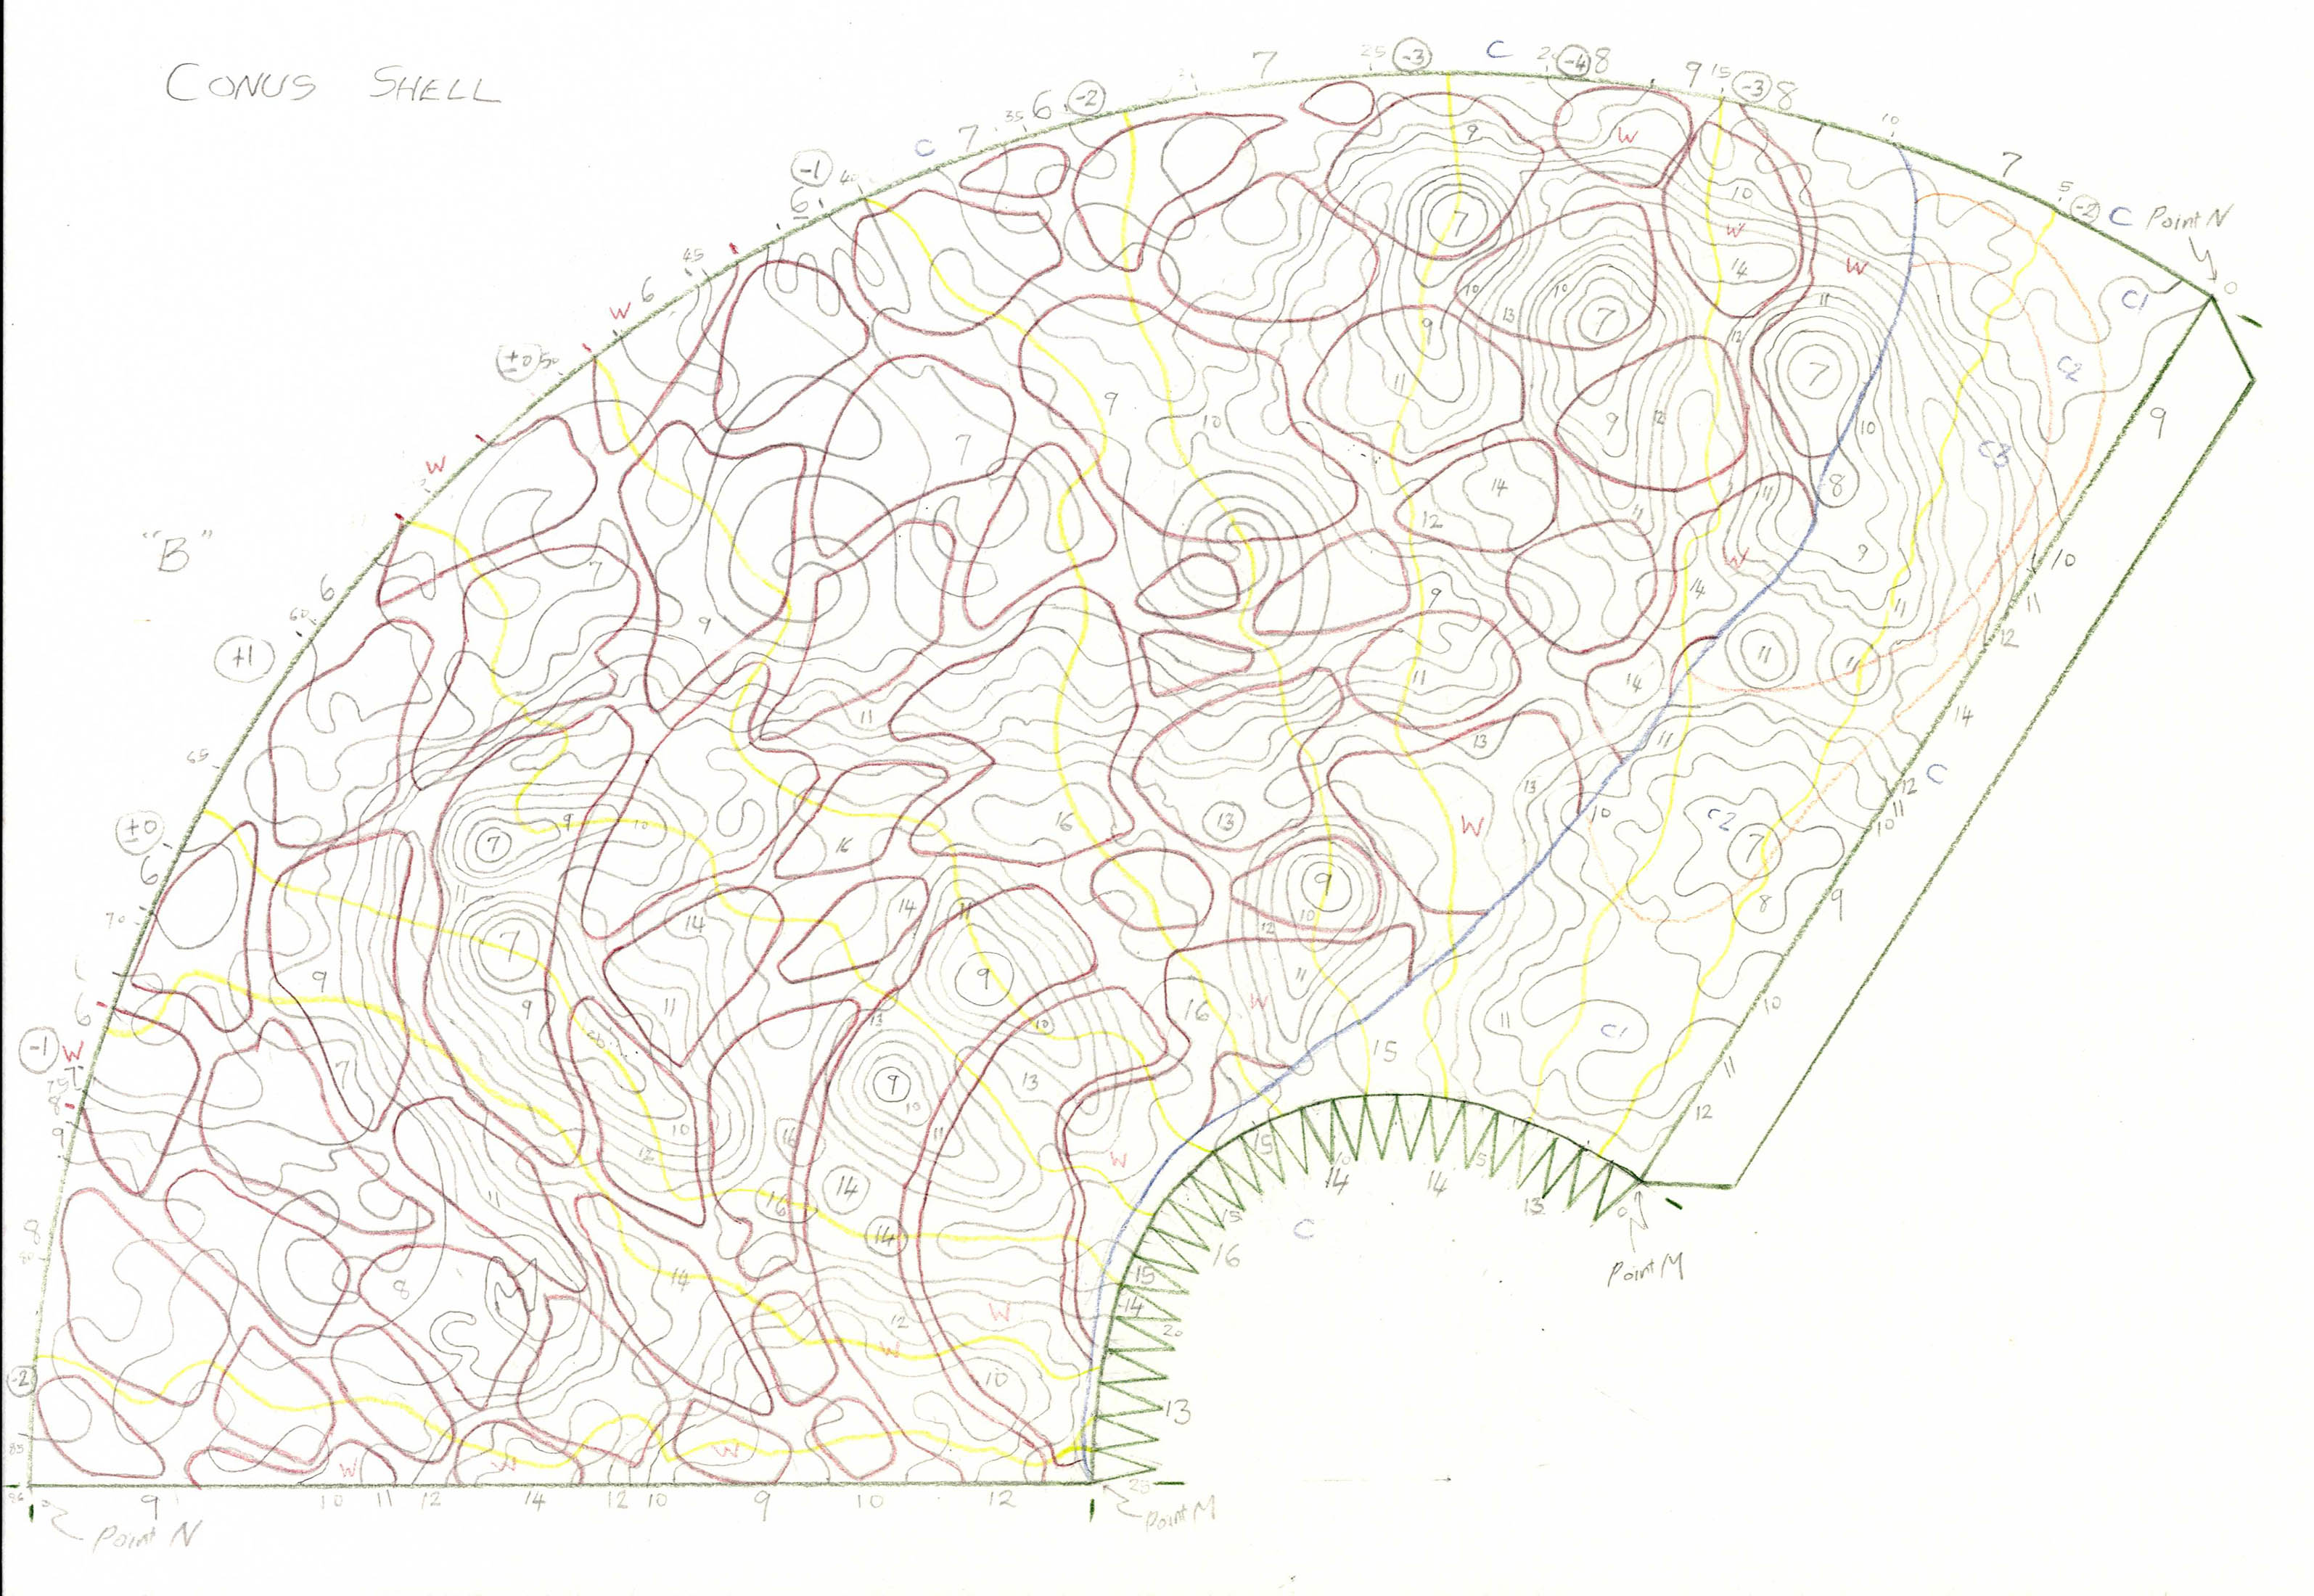
Painting is done one colour at a time. The sequence of colours is visible on the right side of the net below.
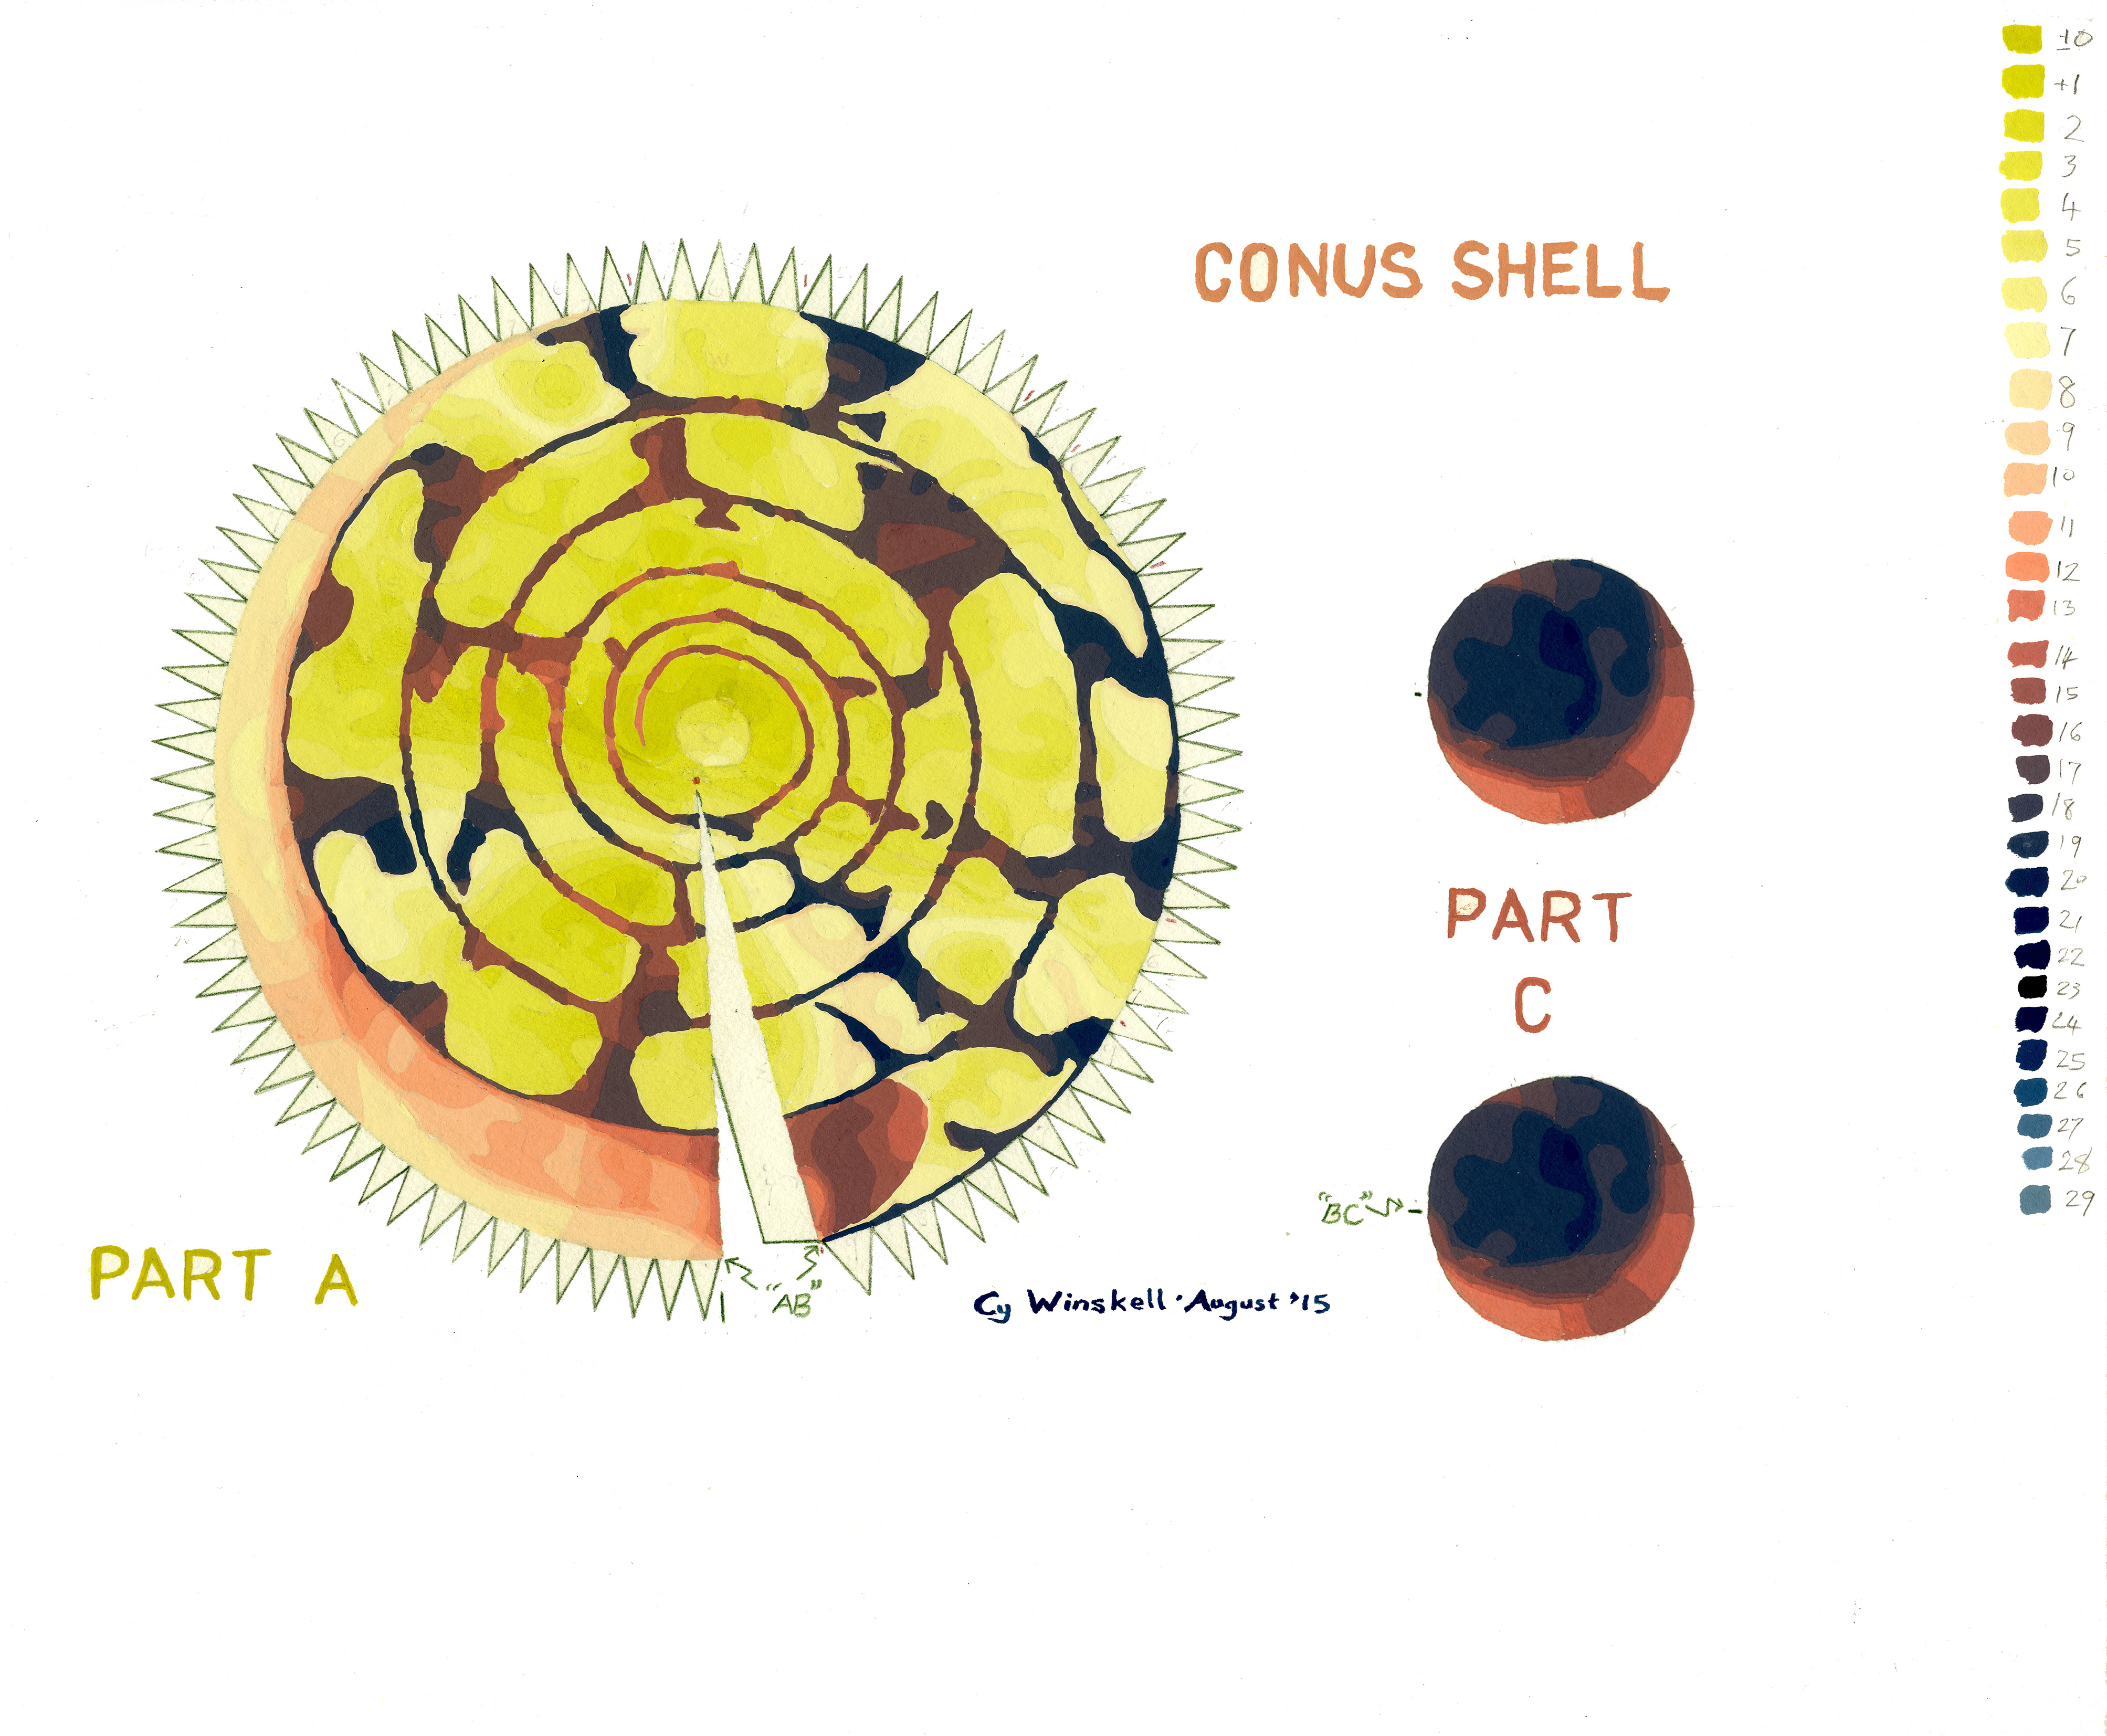
I painted Part C a little too small. Photoshop is quite handy for ironing out errors. It allowed me to enlarge it slightly. Also I duplicated it to allow for a second try if the first try goes horribly wrong. Part C is now a little too large allowing a trim on assembly without worrying about it being too small.
To assemble the shell it is necessary to print the nets, score the teeth, cut out and glue together the parts. I prefer double-sided tape to glue. This keeps my fingers clean and avoids spoiling the coloured surfaces.
If you have read this far I will let you into a trade secret. You can copy these images straight off the site, print and assemble your very own Conus shells. Make sure the heights of both nets are the same. I set them at 210 mm for borderless A4 printing. I would use two sheets of photo matt paper A4 size and about 0.13 mm thickness. If you have Photoshop you can play with slight colour variations in Camera Raw. You can also make the images semi-transparent to give the shells a worn look. 80% opacity is quite effective. The nets above are 100% opacity (that is, unmodified).
Enjoy!